




PSL Scale Wiki / Mirrors & perspective
How to make a true mirror
Two reflections. One view you may not be used to.
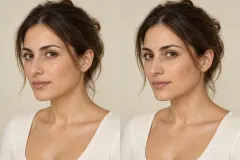
A true mirror is a non-reversing mirror. It lets you see your face in the same left-to-right orientation that a person facing you sees.
The name sounds like a promise of a more accurate face. It really describes a change in orientation. Your face stays the same; the arrangement you are used to seeing changes.
You can explore the effect with two flat mirrors. This guide walks through choosing the mirrors, setting the angle, checking the image and understanding the limitations of a camera alternative.
01 / The idea
What a true mirror changes
Imagine a small mark beside one eye. In your bathroom mirror, you know exactly where to expect it. A non-mirrored view places that mark on the opposite side of the picture. The mark has not moved on your face.
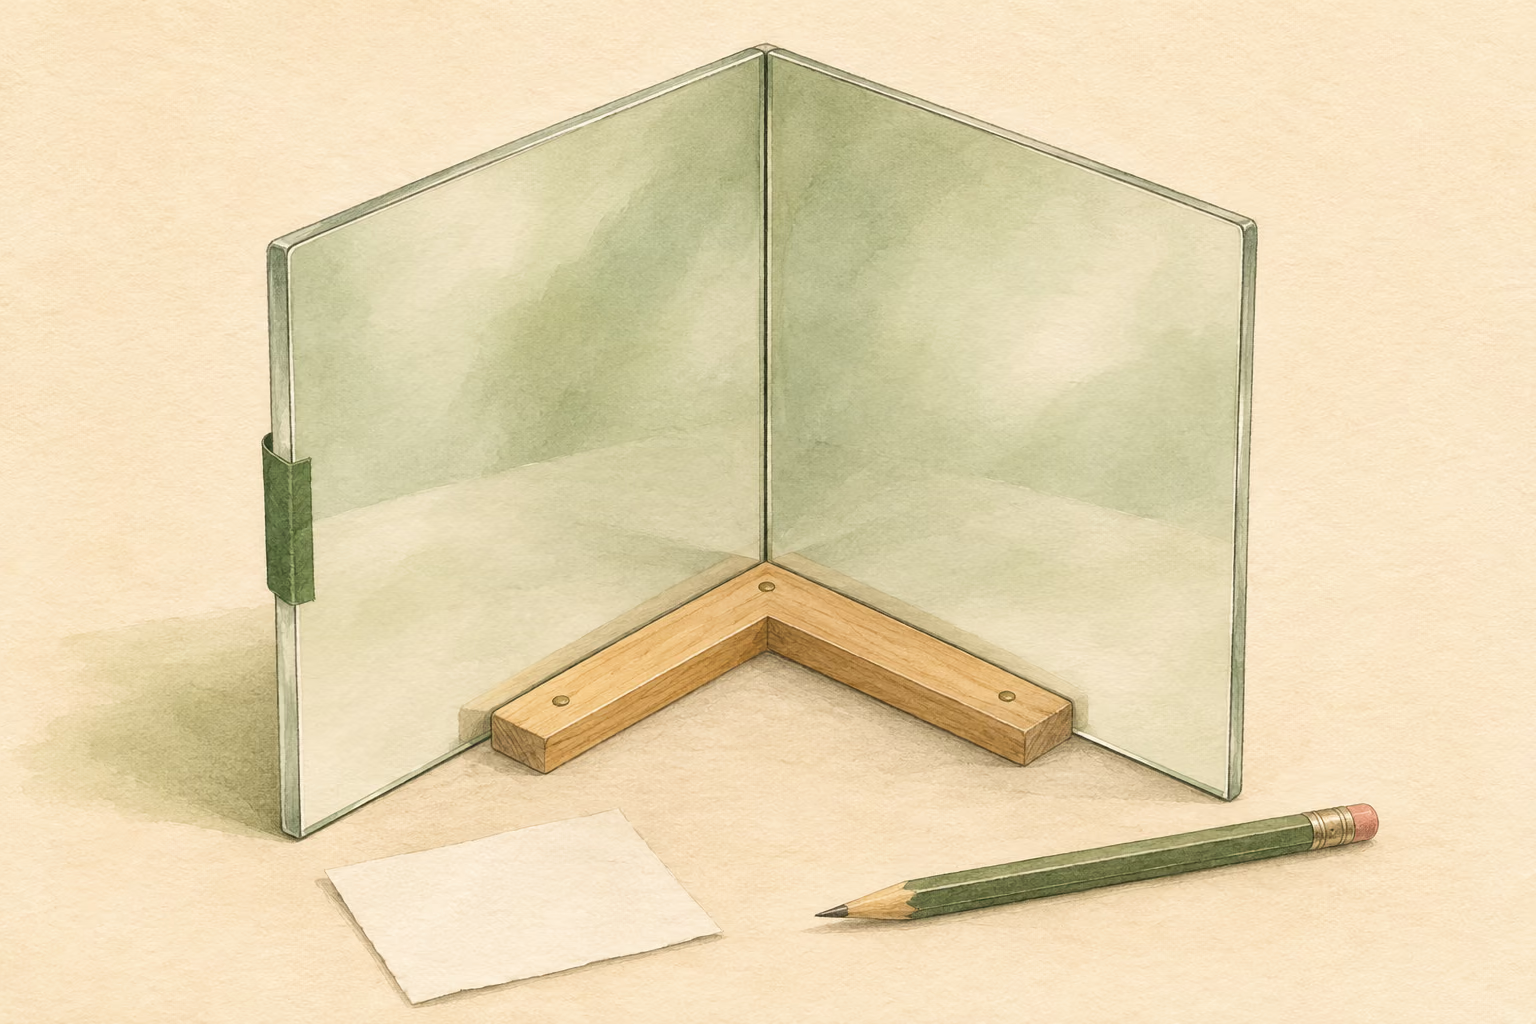
An ordinary mirror gives a single reflection. A corner made from two perpendicular mirrors gives a central image reflected in both surfaces. That double reflection preserves the orientation of writing and of a face viewed from the front.
The useful distinction is orientation, rather than a contest between a “real” face and a “fake” one. Lighting, expression and viewing position still influence what you see in either mirror.
02 / Before you start
Choose your materials
Start with a small tabletop version. A rigid support matters more than a large viewing area: a loose hinge makes every alignment check harder to repeat.
Two flat mirrors with straight edges
Choose similar sizes and enough height to see your face. A thick frame or wide bevel at the joining edge leaves a larger interruption. Flexible mirror sheets can bend and distort the image.
A square or a reliable right-angle support
A carpenter’s square makes the initial angle easier to establish. Use it gently against the assembly; avoid scraping a reflective coating.
Tape and a stable base
Tape the backs to form a hinge, then support both panels so they cannot fall or drift. A hinge by itself does not lock the angle.
A printed card and a horizontal reference
A short word checks orientation. A level stripe or straight edge checks whether the two reflected parts meet cleanly. They test different things.
Use finished mirrors with protected edges. For a simple demonstration, rigid plastic mirrors reduce the risk of broken glass. Do not cut glass for this project; keep fingers away from exposed edges and support each panel before letting go.
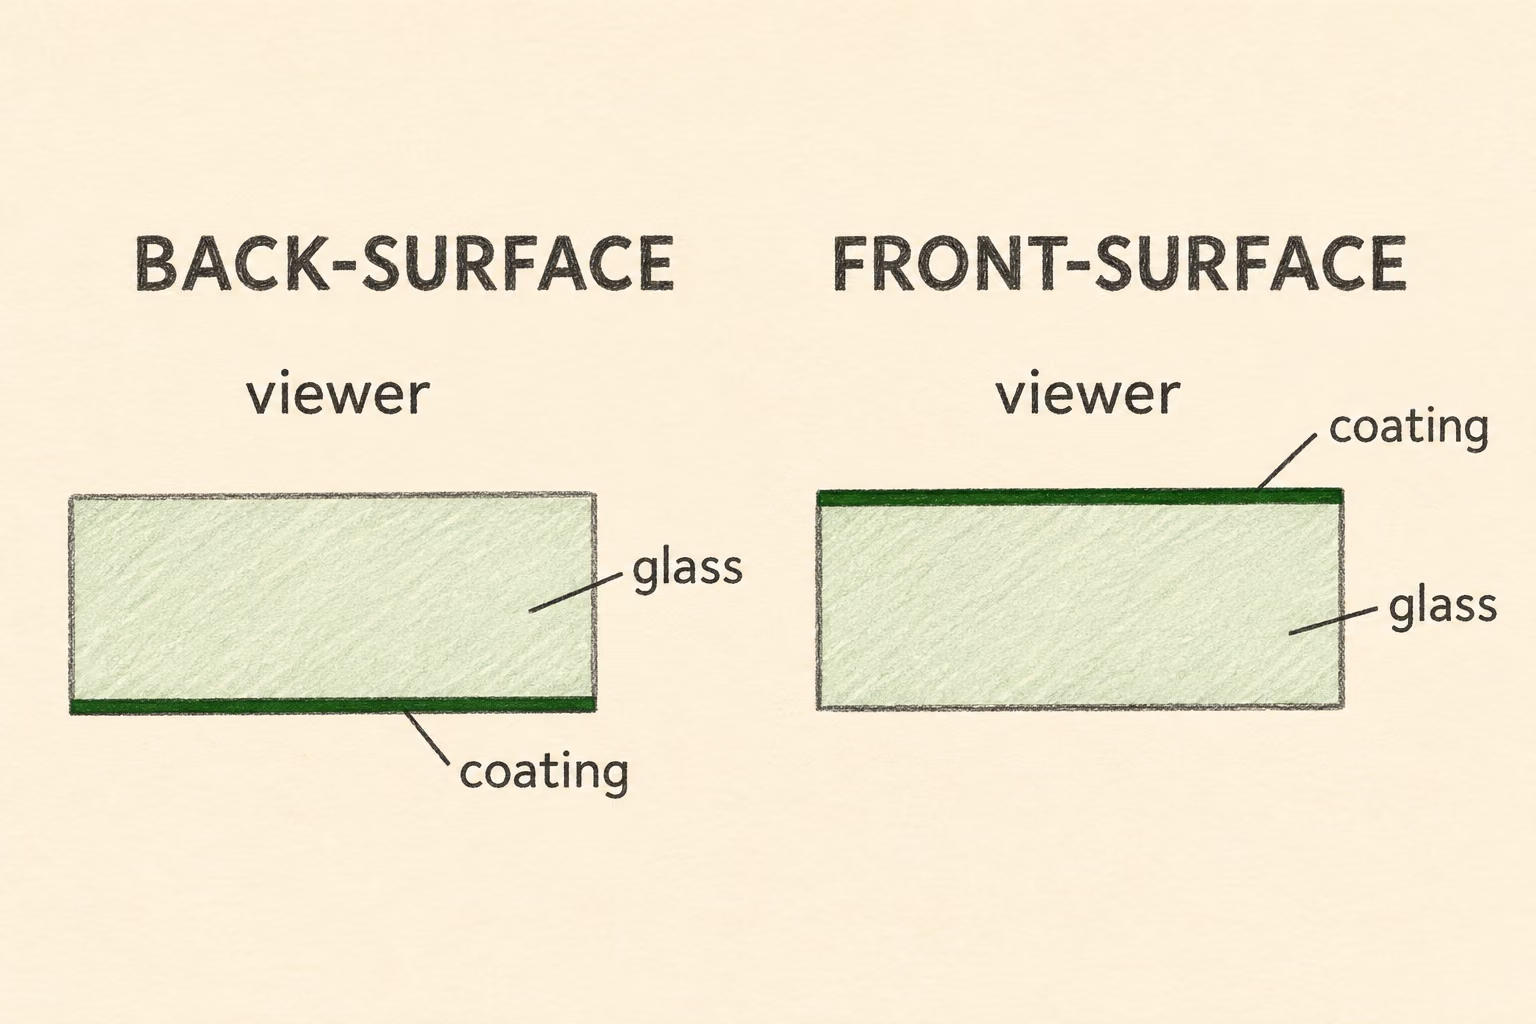
Front-surface mirrors are an optional upgrade. Their coating sits on the exposed face, so handle them by the edges and follow the maker’s cleaning instructions. A regular household mirror is sufficient to demonstrate the orientation change.
03 / The build
Build and check your true mirror
Work on a level table in even light. Finish the mechanical setup before judging the face in the reflection.
- 1
Make an upright corner
Place the mirrors on the base with reflective faces toward each other. Bring their vertical edges close together without forcing them. Tape the backs as a hinge and support the outer edges. The opening should face you.
- 2
Set the inside angle to 90 degrees
Use the square to set a right angle between the panels. Keep both mirrors vertical, with their bottom edges on the same level. Remove the square from the viewing area and check that the support holds the angle.
- 3
Find the double-reflected image
Sit or stand facing the joint, with your face roughly centered on it. Move a little farther away if the view feels cramped. Look into the corner, rather than at a single reflection toward an outer edge.
- 4
Check alignment with a horizontal feature
Hold a straight reference horizontally in front of the assembly so its image crosses the joint. Look for a step, kink or duplicate edge. Make small adjustments to the angle and panel tilt until the two parts meet as cleanly as the mirror edges allow.
- 5
Verify orientation with writing
Hold a card with the word HELLO so the printed side faces the mirrors. In the central double-reflected image, the letters should read normally. If you are reading backward writing, reposition yourself to find the two-bounce image.
- 6
Secure the finished position
Fix the supports, remove loose objects from the base and repeat both checks. Keep the seam upright during use. If the image changes when the table is nudged, improve the support before trying to fine-tune it again.
A readable word confirms the non-reversed orientation. It does not prove that the angle is perfectly calibrated. Use the straight reference as a second check, and expect the physical joint to remain visible with ordinary mirrors.
04 / The optics
Why two reflections work
The phrase “a mirror swaps left and right” is convenient, but incomplete. A flat mirror reverses the direction perpendicular to its surface: front and back. The familiar sideways swap comes from comparing that reflection with a person who has turned to face you.
In the corner view, light reaches you after reflecting from both planes. Two reflections in perpendicular vertical planes are equivalent to a half-turn about their shared vertical axis. Writing can therefore appear with its usual handedness rather than as mirror writing.
This is why the angle and the upright joint matter. Changing the angle changes how the two images meet. Rolling the whole assembly also changes the apparent orientation; for a face comparison, keep the joint vertical.
The idea predates cameras and screens. John Joseph Hooker’s 1887 patent describes a compound mirror built with converging reflecting surfaces. A browser tool reaches a similar orientation on screen by displaying a camera frame without an extra horizontal flip. It does not recreate the mirror’s optical path.
05 / Fine adjustments
Fix the seam and alignment
A dark line and a misaligned reflection can appear together, but they have different causes. Adjust the geometry first. Then decide whether the remaining seam comes from the construction of the mirrors.
| What you notice | What to check | What to change |
|---|---|---|
| A kink or doubled feature at the join | The inside angle and panel tilt | Reset the square, level the panels, then adjust a little at a time. |
| One side appears higher | Whether the panels lean differently or sit at different heights | Level the base and make both joining edges vertical. |
| A fixed dark strip remains | Frames, bevels, a gap and coating behind glass | Use narrower edges and a closer join. Front-surface mirrors can reduce this interruption. |
| Text is backward | Whether you are looking at a single reflection | Center your view on the corner and locate the double-reflected image. |
| The face looks stretched or wavy | Mirror flatness and pressure from the support | Release uneven pressure or replace a bowed panel. Changing the angle will not flatten it. |
| The image shifts whenever you move the base | A hinge or support that flexes | Stiffen the support, then redo the alignment checks. |
With a household mirror, light travels through glass before reaching the reflective coating. At the join, the front edges can meet while the reflecting layers remain separated. Bevels and frames make that interruption larger. A front-surface coating sits at the face of the mirror and allows a cleaner optical join.
Do not keep pushing the panels together to erase a line caused by glass thickness. Excess pressure can chip an edge or bend a panel without solving the optical gap.
06 / The camera option
Use a true mirror online without a build
A camera is useful when you want to compare both orientations of exactly the same frame. In our True Mirror camera, you can switch between Mirror and True, compare them side by side, and freeze a live frame.
- Choose Start true mirror camera and allow camera access, or select Or use a local photo.
- Place the camera at eye level, face it directly, and use even light. Move it farther away if a close selfie exaggerates perspective.
- Select True for the camera’s supplied orientation or Side by side to compare the same moment.
- For a live camera check, hold readable writing toward the lens. Verify which view preserves the writing’s orientation.
- Use Freeze to inspect a live frame, then Stop & clear when you finish. Saving a comparison card is optional.
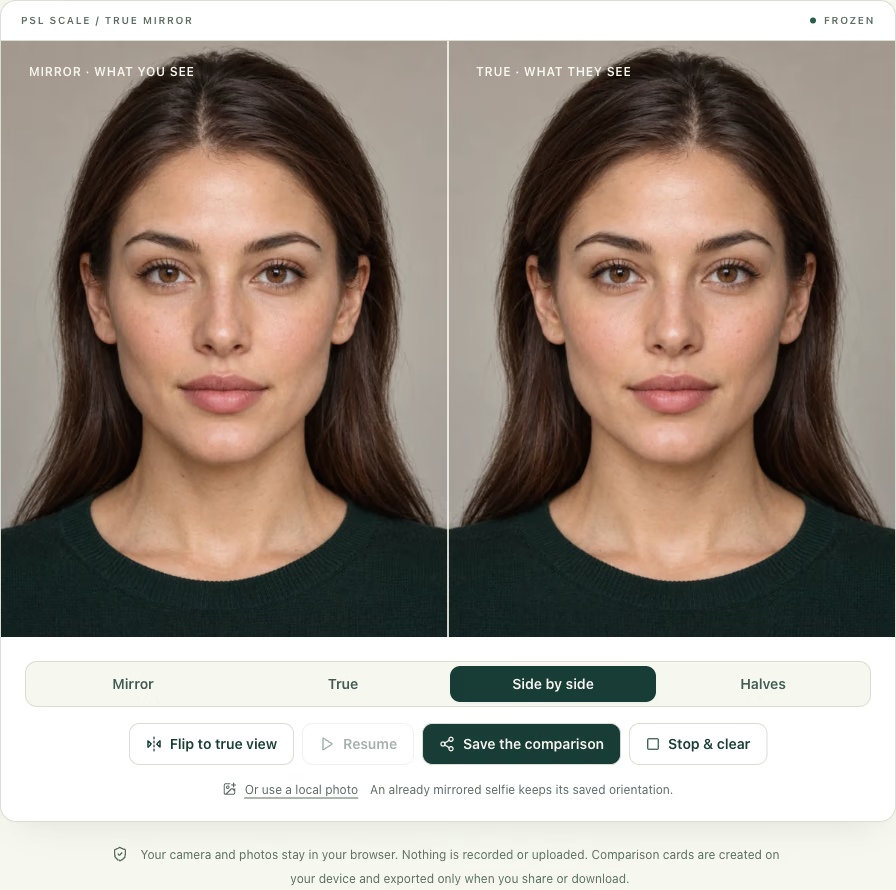
Camera frames and selected photos are processed in this browser for the comparison. The tool does not upload them. A downloaded card or system share leaves the page only when you choose that action.
A saved selfie needs extra care. If the file already contains a mirrored image, preserving its pixels also preserves that earlier flip. Use a known reference in the photo or test a live camera feed instead of trusting the file name or a preview label.
07 / Choose a method
DIY mirror, online mirror or a photo?
| Method | Useful for | Main limitation |
|---|---|---|
| Two-mirror true mirror | A live optical view without a camera or screen | Requires stable alignment; the joint may remain visible. |
| Online true mirror | Switching orientations and comparing one frame side by side | Camera distance, processing and a flat display influence the result. |
| A saved photo | Inspecting a fixed expression or recording a reference | The image may already be mirrored; capture settings and editing history can be unknown. |
Choose the physical version for the optical experiment. Choose the camera version for a repeatable comparison. Neither method removes perspective or recreates every way another person might see you.
08 / Reading the result
Why the non-mirrored face can feel unfamiliar
Your usual reflection gives you years of practice recognizing one arrangement of small differences: a hair part, a raised eyebrow or the way a smile begins. Changing their positions in the picture can make the whole face feel unfamiliar.
Mita, Dermer and Knight’s 1977 experiments found a preference for participants’ own mirror-image photographs, while friends or partners tended to prefer the non-reversed photographs. That finding supports a role for familiarity; it does not turn either image into an objective attractiveness score.
Keep the comparison fair. Use one frame, one camera position and one lighting setup. A horizontal flip changes orientation; moving the camera closer changes perspective. Comparing two different selfies mixes those effects.
If your question is about measurable left-right differences, the free face symmetry test is a separate tool for landmark-based estimates. If it is about proportions, the facial ratios calculator explains the photo measurements. Neither result should be inferred just from how surprising a flipped face feels.
09 / Questions
True mirror FAQ
Can you make a true mirror with two regular mirrors?
Yes. Join two flat mirrors with their reflecting sides facing inward at a 90-degree angle. Look toward the vertical joint and inspect the central image formed by two reflections. Regular back-silvered mirrors work for the effect, although their glass and edges leave a visible seam.
What angle does a true mirror need?
Use a 90-degree inside angle between the reflecting planes, with the joint upright. A square is a better starting point than judging by eye. Check the result with a horizontal reference and readable text, then secure the assembly so the angle stays fixed.
How do I know whether my true mirror is working?
Hold a card with ordinary writing so the printed side faces the mirror. The writing in the central, double-reflected image should read normally. Check that a horizontal feature meets at the joint without a visible change in direction. Readable text checks orientation; the straight feature checks alignment.
Is a true mirror exactly how other people see me?
It matches the non-mirrored orientation of a person facing you. It cannot reproduce every viewing distance, expression or lighting condition. An online true mirror also uses a camera and a flat screen, so camera position and perspective still matter.
Why is there a black line in my DIY true mirror?
The joint can interrupt the reflecting surface. Frames, bevels and a gap make the interruption larger; ordinary mirrors also place their reflective coating behind glass. Better alignment may improve the join, but it cannot remove the physical glass and edge construction. Front-surface mirrors can make a much cleaner join.
Can a phone be used as a true mirror?
Yes, for a non-mirrored camera view. Use an online true mirror and check the orientation with readable text. Camera apps differ in how they display and save selfies. Flipping a saved photo only changes its current orientation; it cannot establish whether an earlier app already mirrored it.
Does a true mirror make your face symmetrical?
No. Changing orientation preserves the differences already present in your face. A left-left or right-right composite is a separate image effect that duplicates one half; neither composite is the original non-mirrored view.
Can I buy a true mirror instead of building one?
Yes. Purpose-built non-reversing mirrors are available. Look for a stable right-angle assembly, the type of reflective coating and the quality of the center joint. The optical principle is the same as the DIY version; construction quality mainly affects alignment and the visible seam.
Are photos uploaded when I use PSL Scale’s True Mirror?
The True Mirror tool processes its camera frames and selected photos in your browser. It does not upload the camera feed or photo for this comparison. Stop & clear stops the stream and clears the current frame; Download or system sharing exports a card only when you choose it.
Sources & further reading
The optical setup, historical note and familiarity finding can be checked against these primary references. The online steps describe PSL Scale’s own tool.
- Exploratorium: Corner Reflector — a hands-on demonstration of hinged mirrors and a 90-degree view.
- John Joseph Hooker, US patent 370,623 (1887) — the compound reflecting-surface design.
- Mita, Dermer & Knight (1977) — Reversed facial images and the mere-exposure hypothesis, Journal of Personality and Social Psychology, 35(8), 597–601.